| |
Eudora 4.3 E-Mail Setup Instructions
Step 1. Open Eudora 4.3.
Step 2. From the Tools menu, select Options.
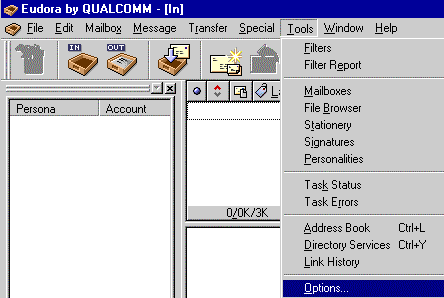
Step 3. Under Category click on Getting Started.
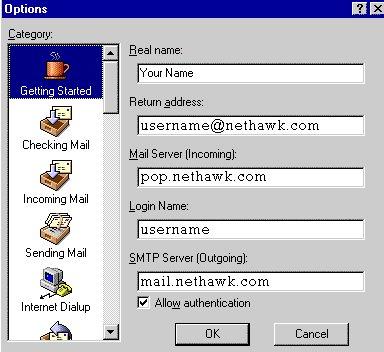
Step 4. In the Real Name text box, type your name.
Step 5. In the Return Address text box, type your e-mail address.
Step 6. In the Mail Server text box, type pop.nethawk.com
Step 7. In the Login Name text box, type your username.
Step 8. In the SMTP Mail text box, type mail.nethawk.com
Step 9. Check the box next to Allow authentication.
Step 10. Under Category, click on Checking Mail.
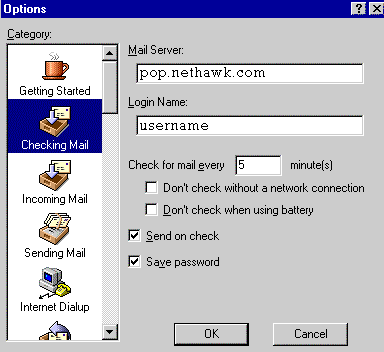
Step 11. In the Mail Server text box, type pop.nethawk.com
Step 12. In the Login Name text box, type your username.
Step 13. Under Category, click on Incoming Mail.
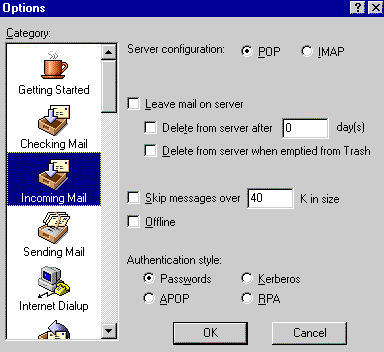
Step 14. Next to Server Configuration, check the circle next to POP.
Step 15. Under Authentication Style, check the circle next to Passwords.
Step 16. Under Category, click on Sending Mail.
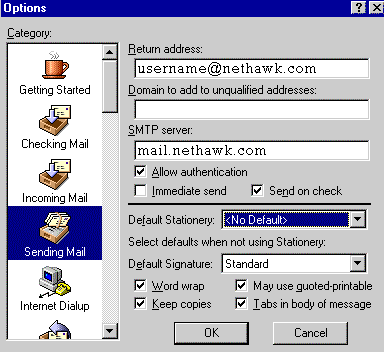
Step 17. In the Return Address text box, type your full e-mail address.
Step 18. Leave the Domain to add to unqualified addresses blank.
Step 19. In the SMTP Server text box, type mail.nethawk.com
Step 20. Check the box next to Allow authentication.
Step 21. Click OK.
|
|
| Don't Qualify? |
| |
If you do not qualify for ISP Wireless at this time, you may qualify for DSL.
DSL is our other broadband service.
To see if you qualify for DSL, click here.... |
|
| No Hidden Fees |
| |
Cable companies charge extra for setup and modem rentals.
ISP Wireless does not charge extra for anything! We have no hidden fees whatsoever! |
|
|